SIGN NOW
Important: To finalize the signature, the user MUST click the "SIGN" button. This will complete the process. The document will not be signed if the user does not complete this step.

Continue reading to learn more about the process of signing:
Overview:
The "Sign Now" functionality allows the requestee to sign documents directly within the platform, ensuring a smooth and efficient signing process.
Functionality:
- Notification: The Project Owner will send the Collaborator a "Send to Sign" request. The collaborator will receive an email and a dashboard notification (platform notifications are shown within the bell icon).
- Access the Document: The collaborator will click on either notification and be directed to the project where the signature is requested.
- Sign Now Indicator: The document will display as "Sign Now" in the menu bar in the dashboard view. To access the document, click on the column titled "Project Name."

4. Opening the Document: The document will open in the "Clean Document" tab on the platform. Here they'll see two important notifications:
a. Project Status "Your Progress": This will show that the project is on the final step. To complete the project the user will need to sign the document. 
b. Document Editing Disabled: This notification indicates that neither to project owner or the collaborator can make changes or updates to the underlying document.

How To Sign A Document:
There are three steps to memorialize an agreement:
- Add Signature
- Add Date
- Sign
All three steps are required to successfully sign a document.
- To start the signature process click "Sign & Finalize":

STEP 1: Add Signature:
- Select "Add Signature." This will present a pad to sign within.

- To sign, use your cursor or finger to draw your signature.

- Click the radio button to accept the terms of the signature process. (This box must be checked).
- Click "Confirm."
- The signature will appear at the top left of the screen within the document.
- Drag and drop the signature to the appropriate section of the document.

- Once the signature is in the desired location, click the green check mark to place the signature within the PDF or the red "x" to delete the signature and start again.
STEP 2: Add Date:
- Select "Add Date." This will allow you to update and add the date to the project.

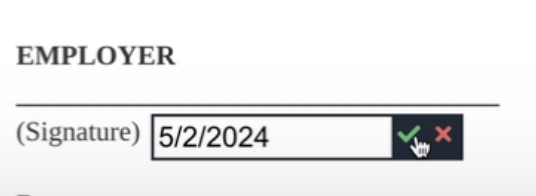
- Drag and drop the date to the desired location and click the green check mark to place it within the document.


- Click the red "x" to delete the date from the document and start again.
STEP 3: Sign:

Sign:
- Select "Sign" - This will memorialize your signature:
- a) send a notification to the Project Owner to sign and "complete" the project
- b) finalize the project moving the status to "Complete."
- You will receive a message showing that your signature has been successfully capture.

- Select "Sign" - This will memorialize your signature:
Reset:
- Select "Reset" to reset any inputted signatures, dates, or text and start fresh.
Completing a Project:
Steps to Complete a Project:
Project Owner:
- The person who sends the invite becomes the Project Owner.
- Only the Project Owner can send the document to the Send to Sign stage to request signatures.
- After collaborators indicate they're ready, the Project Owner is responsible for signing last to finalize the document.
- Once both signatures are completed, the document is marked as Complete, and no further edits can be made.
Collaborators:
- Collaborators can indicate they are ready to sign by clicking the Ready to Sign button.
- They will sign the document first when ready.
- After signing, the platform will notify the Project Owner that the Collaborator's signature is complete and that the Project Owner can now sign.
Once both signatures are captured, the project is marked "complete!"
Was this article helpful?
That’s Great!
Thank you for your feedback
Sorry! We couldn't be helpful
Thank you for your feedback
Feedback sent
We appreciate your effort and will try to fix the article